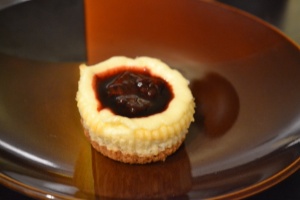
Mainely Inspired- Mini Balsamic Strawberry Cheesecakes

DSC_0067
Sometimes a dish comes along that you fall head over heels in love with. For me that was cheesecake. I remember the time I first tasted it, I was sitting with my family in a booth at a Marie Calendar’s in Auburn, CA waiting for highway 80 to open so we could get up to our ski cabin. Up to the moment I tasted it, the best thing in the world to me was the powder day we would inevitably have the next morning, cheesecake changed that one bite later. I think my brother ate his entire piece in three minutes flat. I on the other hand I savored mine. It was the perfect combination of flavors, sour from the cheese and sweet from the sugar and the texture was unlike any other I had tasted. Love at first bite. Although I have since learned that there are many better cheesecakes than Marie Calendar’s that is still one of my favorite food memories.

For a long time I was so infatuated with restaurant cheesecake that I never dreamed it could be made at home, from scratch. One summer my Mamma had her friend Carlyn up to stay with us in Maine for a few weeks. Carlyn made the most delicious strawberry cheesecake I had ever had, and introduced me to the (dangerous) idea that your favorite restaurant desserts can indeed be made in your very own kitchen. Turns out the hardest part of cheesecake is finding a springform pan.

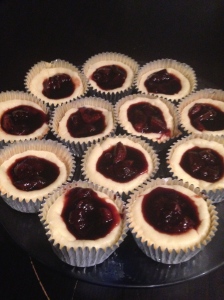
Fast forward several years and I wanted to make my favorite dessert into an easier to eat (and bake) treat. Enter cheesecake cupcakes, or mini cheesecakes, my new favorite (and impressively easy) dessert for when the boyfriend and I have company over for dinner.

IMG_3373What you need:

Cheesecakes:

Cupcake tray

Cupcake liners

8 graham crackers, processed in the food processor to crumbs

1/2 stick of butter, melted

2 packages cream cheese, softened

2 eggs

2/3 -3/4 of a cup of sugar, depending how sweet you want the cheesecake

1 tablespoon vanilla

2 tablespoons lemon juice

Preheat oven to 350 degrees. Begin by mixing together the melted butter and graham cracker crumbs together in a bowl. Press 1 teaspoon of the mixture into the bottom of each cupcake liner and bake for 6 minutes to set. In the bowl of a stand mixer (or a regular bowl if you don’t have a stand mixer) add remaining ingredients. Beat until light and fluffy. Spoon the cheesecake mixture into the cupcake holders and bake for 15 minutes or until set.

Cool on the counter, and chill for at least 4 hours. Top with strawberry balsamic reduction, recipe follows.
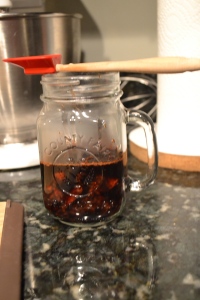
DSC_0043Strawberry Balsamic Reduction:

Unfortunately I don’t really have a recipe for this one, I cook strawberries (or raspberries if I don’t have strawberries, I bet blueberries would work too) with balsamic vinegar until it reduces, the fruit breaks down and it forms a lovely thick sweet-tart sauce. It is incredible poured over ice-cream, and as we discovered the other night, a great accompaniment to cheesecake!


Happy Eating!

Mainely Inspired – Easy Home Baked Crusty Bread

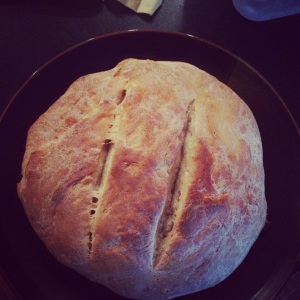
Baked BreadThere really isn’t anything quite like freshly baked bread. Especially right from the oven, with good butter. It is one of life’s simplest delights, and one my Mamma mastered so well I have always been a bit afraid to try baking “real” bread. Now when I say real bread, I mean the kind with yeast. I am all about pumpkin bread, banana bread and even beer bread, pretty much any quick bread you can name. The yeast bread however, I have always left in Mamma’s capable hands. Having recently moved away from San Francisco, and Mamma’s cooking, I have finally taken it upon myself to attempt to master the art of bread baking. This loaf is a very simple white bread, nothing too fancy going on but it’s a great place to start for beginners (like me).


You will need:

  • 1 packet of yeast
  • 1 ½ cups luke warm water
  • 3 ¼ cups flour
  • ½ tbsp. salt
  • 1 tsp sugar
  • olive oil for rising bowl
  • warm place to let the bread rise
  • pizza stone for baking


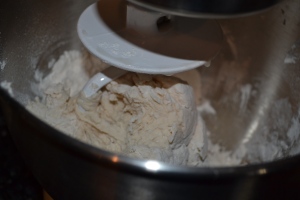
Bread KneadingStart by mixing the warm water, sugar and yeast in a bowl let this mixture sit for 5-10 minutes until you see bubbles forming on the top. This wakes the yeast up, and makes rising your dough easier. Next, mix the water/yeast mixture, flour and salt together in your mixer with the dough hook. If you don’t have a stand mixer, do this by hand. You want the dough to pull together into a ball, not a perfect one but it should hold together.

At this point, knead the dough a few times to form a ball, and place it in your oiled bowl. Let the bread rise in a warm place, covered in a clean dishtowel, for at least two hours. I recommend preheating the over to 170 degrees, turning it off before it gets all the way hot, and rising your bread in the oven.

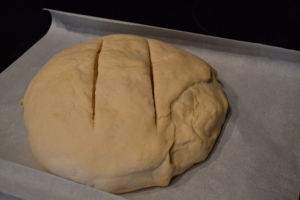
Before BakingWhen you are done letting the bread rise, take it out of the oven and knead the dough into a ball and rest it on parchment paper on top of the oven. Heat the oven to 450 degrees, with the pizza stone on the middle rack and a baking pan on the rack below (you will later fill this with hot water). Let the bread rise a second time, for about 45 minutes. After the second rise, cut 2-3 slashes in the top of the bread with a sharp serrated knife. Slide the bread, with the parchment onto the pizza stone and pour hot water in the baking pan and quickly close the door. Bake 25-30 minutes.  Let cool before slicing (I usually cheat here, but I hear it makes the bread better to wait).

Happy Eating!

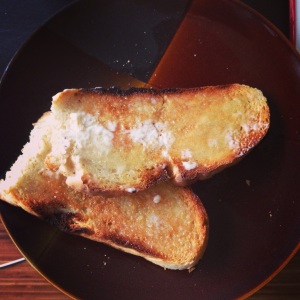
Toast


Mainely Inspired – Chocolate Chip Cookie Pie

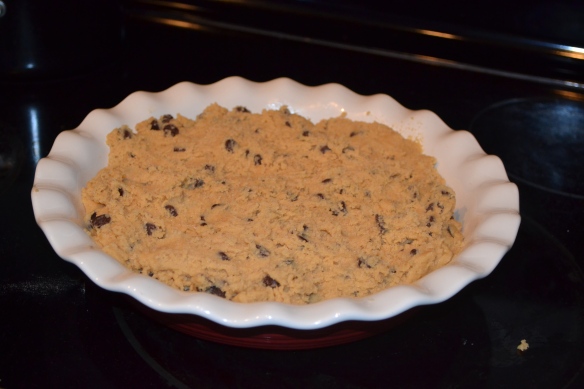
My boyfriend loves chocolate chip cookies, plain as you can get, nestle tollhouse chocolate chip cookies. So when I asked him what he wanted for his birthday dessert this year, and he said chocolate chip cookies, it should have come as no surprise (although I do admit to being a bit disappointed). Now don’t get me wrong, chocolate chip cookies are awesome, but I have been making them since I was 12 and I was selfishly looking forward to showing off my baking skills. To satisfy both of us I decided to make chocolate chip cookie pie, and the results could not have been more delicious. This pie has a crispy crust, gooey chocolate chip center and manages to truly be the best of both a cookie and a pie combined into one.

DSC_0026

You will need:

Deep dish pie plate, buttered

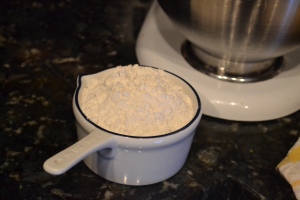
2 3/4 cups flour

1 tsp baking soda

1 1/4 tsp baking powder

1 cup salted butter, at room temp

1 1/2 packed brown sugar

1/2 cup white sugar

3 eggs

1 tbsp vanilla

1 package chocolate chips (your favorite variety)

DSC_0038

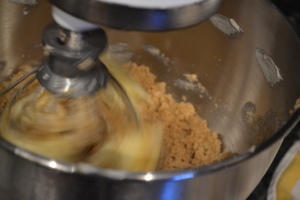
Preheat oven to 350 degrees (farenheit). Start by creaming together the softened butter and sugars in a bowl of a mixer (I use a stand mixer, but before I had one I used to do this by hand, it’s a great arm workout). Add in the eggs, beating after each one until fully incorporated, and repeat with the vanilla.

Next, mix together the other dry ingredients in a bowl. Here is where most recipes tell you to sift these ingredients together: call me a rebel but I have never once done this and my baking has never suffered for it. Mix in the flour, a bit at  time trying to avoid making a spectacular mess with the electric mixer as I often do at this stage. Once the flour is all combined (check the bottom of the bowl if you are using an electric mixer) fold in your chocolate chips, and try not to eat all the cookiepie dough before it gets into the pie plate.

DSC_0064

Cook the pie until the crust is golden brown and starts to firm, and a knife inserted into the middle comes out clean enough that it seems gooey but not raw, which is a rough calculation but I trust you can manage it. I suggest you serve this with ice-cream, because its delicious.

Good luck trying not to eat it all in one sitting, and Happy Eating!

DSC_0080

Mainely Inspired – Shrimp Ceviche

Mainely Inspired – Shrimp Ceviche

I love seafood of almost all kinds. Whether its lobster cooked out on an island after a day of boating, a basket of fried clams, a good piece of salmon at Fish in Sausalito, oysters from Hog Island Oyster Co or Fish tacos in Mexico in my opinion; if it’s freshly caught it’s hard to go wrong.

This brings me to a particular favorite: ceviche. It is healthy (if you skip the tortilla chips), incredibly tasty, very adaptable to specific tastes and relatively easy to prepare. While I am sure there is a better definition to be found, the one I go by is seafood “cooked” in citrus juice (and sometimes a bit of tequila if you are feeling adventurous), add in some chopped onion, avocado, cilantro and any peppers you may want and let it marinate for a few hours and you have a delicious cold seafood dish.

For this particular version I decided to go with shrimp, however feel free to experiment (bay scallops work really well, as does any firm white fish such as halibut cut into a ½ inch dice)

You will need:Fresh Shrimp Ceviche

  • 1 pound raw medium or large shrimp, peeled and de-veined
  • 1-2 avocados (depending on taste)
  • 7 limes
  • 3 lemons
  • 1/3 cup cilantro
  • 1 teaspoon cumin
  • Cayenne pepper to taste
  • Large pot of boiling water

Begin by juicing the citrus into a large, nonreactive bowl and mixing with spices (glass or ceramic, stay away from metal for this one). Blanch the shrimp in boiling water for 1 minute, just until outsides are pink but not cooked through (if using other seafood skip this step) and immediately run under cold water to stop the cooking process. Chop the shrimp into 1 inch pieces and submerge in the citrus juice (make sure the citrus covers the shrimp, as this is what is going to “cook” it all the way). Let marinate for an hour or two, just before serving toss in avocado and cilantro (tomato and onion are also great additions to this dish; my boyfriend just doesn’t prefer them so I leave them out).

Serve with your favorite tortilla chips.

Happy Eating!

Peppermint Shortbread and Pumpkin Mini Cheesecakes

As the temperature (finally) starts to drop here in San Francisco and the holidays are just around the corner I find myself squarely in the middle of what I like to call baking season. It’s the season where there is a party every weekend (and a hostess gift to go along with it). Where cookies leave the pantry faster than I can make them and where pies are as common as cereal. I personally like to give every hostess a little something sweet along with a bottle of wine; it’s an effective combination that usually covers everyone’s tastes. To that end, this past weekend I spent Sunday with a few girlfriends testing recipes in preparation for the holiday baking season. We decided on two types of cookies and a mini cheesecake for good measure, and I am sharing the recipes with you here today.

Peppermint Shortbread (warning, if you add too much candy cane, the cookies turn out more like lace than shortbread, this can be both good and bad!)

You will need:

  • 3 cups flour
  • 3 sticks butter at room temperature
  • 1 cup sugar
  • ½ teaspoon fine salt
  • 1 tablespoon vanilla extract
  • 1 cup crushed candy canes

Crush candy canes until they are a size you would want to find in a cookie (we found a food processor came in handy here).  In a large mixing bowl cream together the butter and sugar. Add the vanilla extract and combine. Add the flour mixture and mix very slowly just until combined. Add in the crushed candy canes and mix just until combined. Chill the dough for at least 4 hours (can also be frozen, hello ready bake cookies!) Make one inch balls out of the dough and flatten slightly, bake for 10-12 minutes in a 350 degree oven until done on a parchment lined cookie sheet (should not be browned).


Maple Oatmeal Cookies

You will need:

  • 1¼ cup flour
  • 3 cups old fashion oats (you want them to hold up in the cookies, so don’t use the quick cook ones)
  • 1 teaspoon fine salt
  • 1 teaspoon baking soda
  • 1½ sticks of butter at room temperature
  • ½ cup sugar
  • 1 cup maple syrup
  • 1 teaspoon vanilla extract
  • ½ teaspoon cinnamon
  • 1 cup raisins (or leave out the raisins, up to you, I made some with and some without)

Heat the oven to 350 degrees. In a large bowl cream the sugar and butter until light and fluffy. Beat in the egg, syrup and vanilla. In a separate bowl mix together the oats, flour, baking soda, salt and cinnamon. Mix in the dry ingredients a little at a time until fully combined. Lastly add the raisins and stir just to combine. Drop spoonfuls on a greased cookie sheet 2 inches apart and bake for 10-12 minutes or until golden brown.

Mini Pumpkin Cheesecakes

You will need:

  • 2 muffin tins and cupcake liners
  • 1 package graham crackers
  • 1/3 stick of butter, melted
  • 4 (8 ounce) packages cream cheese, at room temperature
  • 1 can of butter
  • 5 large eggs
  • 1¾ cups sugar
  • 1½ teaspoons cinnamon
  • ½ teaspoon nutmeg
  • 1 tablespoon vanilla
  • 2 tablespoons flour

Heat the oven to 350 degrees. Crumble the graham crackers and mix with the melted butter until evenly combined. Press into the bottom of the cupcake liners and bake for about 10 minutes, or until golden brown and set. Let cool completely. In a large mixing bowl beat the cream cheese and sugar until light and fluffy. Add the pumpkin and beat until fully incorporated. Beat in the eggs one at a time. Add the spices and vanilla and beat until fully incorporated. Lastly beat in the flour. Fill each of the cupcake liners with the cheesecake batter and bake until the cakes are set and the centers are just jiggly. Chill well before eating.

Hope this starts your holiday baking off well.

Happy Eating!

-Georgia

Apple Cupcakes with Caramel Cream Cheese Frosting

Perhaps I am a just sucker for all things seasonal, but fall seems to bring out the nostalgic side in me with a passion. Caramel apples, trick or treating, apple picking, hay rides; name something classically fall and I adore it. There is something about classic events and flavors that can’t be beat. They remind you of the past while bringing pleasure to the present. So when Sunday came around this week and I was getting ready to bake I decided I wanted to combine a few of my favorite things, cupcakes and caramel apples, into one treat.  The Apple Cupcake with Caramel Cream Cheese Frosting was born.  The cupcake itself is almost muffin like (and I have to admit I did eat one for breakfast minus the frosting Monday morning) but once you add the frosting there is no mistaking, this is a cupcake for sure.

What you need:

For Cupcakes:

  • Cupcake pan (mini or regular size, I used both)
  • 2 ¼ cups flour
  • 2 teaspoons baking soda
  • 2 teaspoons cinnamon
  • 1 ½ teaspoons pumpkin pie spice
  • 1 stick of butter, softened
  • 1 ½ cups sugar
  • ½ cup brown sugar, packed
  • 2 eggs
  • 1 ½ teaspoons vanilla extract
  • 5 large apples, shredded on the large side of a cheese grater (I used granny smith and gala)

For Frosting:

  • 12 oz cream cheese, softened (1 ½ bricks)
  • 1 stick of butter, softened
  • 1/3 cup caramel sauce (I used Trader Joe’s Salted Caramel)
  • 2-3 cups powdered sugar
  • 1 teaspoon vanilla
  • 1 teaspoon cinnamon
  • Food coloring if wanted

Heat the oven to 350 degrees. If using a large cupcake pan line with paper liners, for the small pan line with liners or spray with non-stick spray (I just used the spray and it was fine. Whisk together flour, baking soda and spices and set aside. Cream together butter and sugar until they are pale and fluffy. Add in eggs and vanilla. Mix in the apples until well combined. Mix in the flour mixture until just combined. Fill cups two-thirds of the way with batter and bake for 15-20 minutes or until the tops spring back when touched.

Frosting:

Beat together cream cheese and butter until fluffy. Slowly drizzle in the caramel sauce and continue to beat. Add in cinnamon and vanilla. Add in powdered sugar ½ cup at a time until you like the taste.

Frost cupcakes when they are completely cool and serve.

Happy Eating!

-Georgia

Roast Chicken like Mamma makes

Growing up there was one dinner my Mamma cooked that my siblings and I could all agree was perfect each and every time she made it. Roast chicken, in the style of Zuni Café. The scent of the chicken cooking would permeate the whole house, and it was always my favorite meal to come home to. The chicken itself is incredibly moist and flavorful, and the skin gets crispy, almost like bacon. Now that I live on my own I have my own version of her classic recipe, and the smell of it still makes me feel at home. In my opinion the best recipes go beyond great tasting food, they connect you with the best memories and experiences from your past, and this chicken encompasses that entirely. (The other think I love about this recipe is there is no measuring!)

You will need:

  • Cast iron skillet
  • Roasting/frying chicken (whole)
  • Rock salt
  • One onion, roughly chopped
  • Peeled baby carrots

Start by salting the outside of the chicken. The salt is going to pull the moisture out of the skin (which helps it crisp) as well as  the meat. I suggest doing this is the morning before you are going to be cooking the chicken, the longer the salt is on the skin the better! About an hour to an hour and a half before dinner time (depending on the size of your chicken) heat the oven to 475 degrees. Place the chicken in the cast iron skillet with the breast side up. Toss carrots and onion in olive oil and place surrounding the chicken in the skillet. Roast until the juices from the thigh run clear. Serve the chicken with the carrots and onions, with pan juices.

Happy Eating!

-Georgia

A Cookie Baked into a Brownie

I like to bake on Sundays. It’s a nice escape from my otherwise hectic and busy life (admittedly by choice). It reminds me of being in the kitchen in Maine in the summer, surrounded by family and being strangely at peace even amidst the madness. Eight cousins running around, my aunt trying to make dinner and my Mamma trying to make sure we had the ingredients right, and never worrying when we made a mistake. I have always heard that baking is an exact science, yet I have never found this to be true in my own experiences (knock on wood). This weekend when I asked my boyfriend what he wanted as a treat (before we started our pre-holiday diet) he said cookies, and brownies. Just because I like to over-use my cupcake pan (and break baking rules) I decided to bake the cookies directly into the brownie batter. The result was a chocolate-y treat that was moist and dense, packed with flavor and made for a great sundae addition.

You will need:

Brownie Batter

  • 4 eggs
  • 1 cup sugar
  • I cup brown sugar (not packed)
  • 2 sticks of butter, melted
  • 1 ¼ cup cocoa powder
  • 2 teaspoons vanilla extract
  • ½ cup flour
  • ½ teaspoon salt

Chocolate Chip Cookie Dough

  • ¾ cup sugar
  • 1 cup brown sugar (packed)
  • 2 sticks of butter, softened
  • 1 tablespoon vanilla extract
  • 2 large eggs, lightly whisked
  • 3 cups flour
  • ¾ teaspoon baking soda
  • ¾ teaspoon salt
  • 1 ½ bags semi-sweet chocolate chips (I use the Ghirardelli kind)

Preheat oven to 350 degrees. Spray two muffin pans with non-stick spray.

Brownie Batter:

Whisk eggs until they are light and fluffy. Add both sugars and beat. Add the remaining ingredients and mix until combined.

Cookie Dough:

Cream the butter and sugars together. Add the vanilla and eggs. Combine the dry ingredients separately and add slowly to the mixture. Stir in the chocolate chips.

Fill the cupcake wells halfway with brownie batter. Make a ball of cookie dough, flatten slightly and place inside the brownie batter. Bake for 19-23 minutes, or until a knife inserted into the brownie portion comes out clean.

Happy Eating!

-Georgia

DIY Vanilla-Citrus Body Scrub

Growing up I remember making Christmas sugar cookies with my mom and playing the scraps of cookie dough when we were done. My hands were always so soft! That softness was my inspiration for my vanilla-citrus body scrub. With my boyfriend away for the weekend I took the opportunity for some Saturday pampering. The scrub I created mimics the feeling I got from playing with cookie dough, with more skin friendly ingredients. It is also much more shelf stable, and smells delightful! Sugar and sea salt gently exfoliate while olive oil hydrates and vanilla and lemon give a wonderful perfume.

You will need:

  • ½ cup brown sugar
  • ¼ cups white sugar
  • ¼ cup sea salt
  • Lemon zest
  • 1 tablespoon lemon juice
  • 1  tablespoon honey
  • 1 tablespoon vanilla
  • About ¼ cup olive oil
  • Jar to save your scrub

Start mixing together the sugar, salt and lemon zest until well combined. Add wet ingredients, minus olive oil, and mix. Slowly drizzle in the olive oil, mixing until the desired consistency has been reached.

Pamper away!

-Georgia

* Feel free to subsitute any citrus for lemon, grapefruit works really well!

Refrigerator Pickles

I have been on a bit of a “canning” kick of late. I think it must be a combination of the mason jars sitting in my kitchen and too much time on pinterest (I blame football season, a girl can only take so much!) Since this was my first time making pickles I had to do some research. When I am making something new I tend to read 5 or 6 recipes and create my own based off of those, since I am bad at following recipes I find getting to know the process and general idea helps me more, and usually gives me a pretty good base to work off of.  Most of the recipes I looked at called for both garlic and coriander (both of which I adamantly refuse to cook with) so being the cooking rebel that I am I left both out. My pickles still tasty (there is admittedly some playing still to do with the recipe, but they are good for a first attempt). Since these are refrigerator pickles there wasn’t technically any canning involved, however they are kept in mason jars, that’s canned by my standards!

What you need:

  • Mason jars (or other air tight glass container)
  • Cucumbers to fill your jar(technically pickling ones, but my grocery store was out so I just bought the regular ones and it was fine)
  • 1 ¼  cups distilled white vinegar
  •  ¼ cup white sugar
  • ¼ cup salt
  • Mustard seeds
  • Dill seeds
  • 2 cups boiling water
  • Fresh dill

Start by mixing the vinegar, water, salt and sugar together in a heat proof bowl to create the brine. Mix together until the salt and sugar have dissolved. Taste the brine at this point, if you don’t like it, play with it! Ultimately, this will flavor your pickles so make sure you like what you make. Add the rest of the ingredients to your mason jars and distribute evenly (or other container). Pour the brine over the cucumbers until they are fully submerged. Close the lids and let cool on the counter, once cool refrigerate immediately. Wait 24-48 hours and enjoy.

Happy eating!

-Georgia